Introduction
Welcome to our easy DIY shopping bag tutorial! This step-by-step guide will show you how to make your very own reusable shopping bag. The process is straightforward, making it perfect for beginners and seasoned crafters alike.
Whether you are looking to reduce waste, save money, or simply enjoy making things by hand, this project is for you. Using basic sewing skills and some creativity, you’ll transform simple fabric pieces into a stylish and sturdy bag. Plus, you’ll feel a sense of accomplishment carrying your homemade tote on your next trip to the store.
So, grab your sewing kit, choose some fun fabric, and let’s get started on creating a shopping bag that’s uniquely yours!
Preparing Your Fabric
Before diving into the sewing part of this project, choosing and preparing your fabric is key. This stage sets the foundation for your DIY shopping bag, ensuring durability and style. Follow these simple steps to get started on the right foot.
Selecting the Right Materials
First, pick fabrics that are both sturdy and appealing. Canvas, denim, or heavy cotton are excellent choices. They can withstand the wear and tear of regular use. Consider using unique designs or colors for a personalized touch. Remember, the inside lining can be a different pattern to give your bag a fun, contrasting interior.
Cutting Your Fabric Pieces
To make the cutting process smooth, you’ll need a sharp pair of scissors or a rotary cutter. Lay out your main fabric and lining on a flat surface. Use an existing shopping bag as a template or create your own pattern resembling a tank top silhouette for simplicity. Cut out two pieces for the outer part and two for the lining. Ensure the fabrics are neatly aligned before cutting to maintain uniformity in size and shape.
With your fabrics chosen and cut, you’re now ready to move on to the sewing steps, where your shopping bag will start taking shape.
Sewing Process
Embarking on the actual assembly of your DIY shopping bag begins with the sewing process. This stage requires a bit of focus and precision to ensure a strong, long-lasting finish. Let’s break down the sewing steps you’ll need to follow.
Sewing the Sides Together
Start by laying the two pieces of your outside fabric with their right sides facing each other. Ensure the edges line up perfectly. Pin the sides to secure them in place before sewing; this helps avoid any fabric slipping. Stitch down each side with a straight seam, keeping an even margin. Repeat this with your lining fabric, and you’ll have the basic form of your shopping bag ready.
Attaching the Lining
Now, it’s time to combine the bag’s exterior with the interior lining. Turn the outside part of your bag right-side out, so the seams are on the inside. With the lining still inside out, insert the exterior bag into it, ensuring right sides are together. Line up the seams and pin them, especially around the top edge, which will form the opening of your bag. Sew around that top edge, but remember to leave the sections by the handles unsewn—you’ll finish those later.
Pressing the Fabric
Pressing the seams is critical for a polished look. This step can’t be stressed enough; it distinguishes a professional-looking bag from a hastily-made one. After sewing the sides together and attaching the lining, turn the fabric open at each seam and press it flat with an iron. This will make your finished bag look crisp and neatly crafted. Don’t rush through this step, as precise pressing shapes the final product’s overall quality.
Following these key steps for sewing and pressing will set the foundation for a well-made shopping bag. With the structure in progress, let’s proceed to assembling and perfecting your homemade accessory.
Assembling the Bag
You’ve got your sides sewn and lining attached. Now, bring those pieces together to assemble your bag.
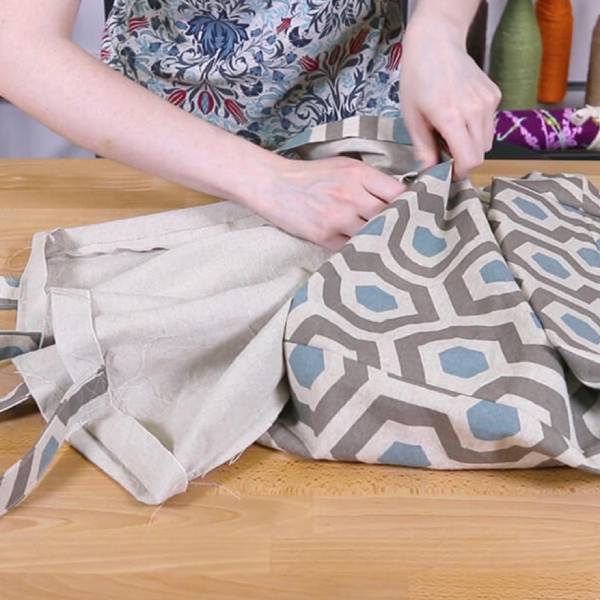
Pinning the Top of the Bag
Lay your bag flat with the exterior fabric facing up. Match the lining and outer fabric edges at the top. Start pinning from the side seams. Make your way around the top, leaving the handle areas open. Match up curves and check alignment as you go, ensuring a neat finish.
Sewing the Top and Making Gussets
After pinning, sew around the top edge, avoiding the handle areas. Next, turn the bag inside out. Create gussets by folding the sides towards the center and pinning the bottom. Sew across to form the bag’s base, ensuring durability for carrying heavy items.
Inverting the Bag
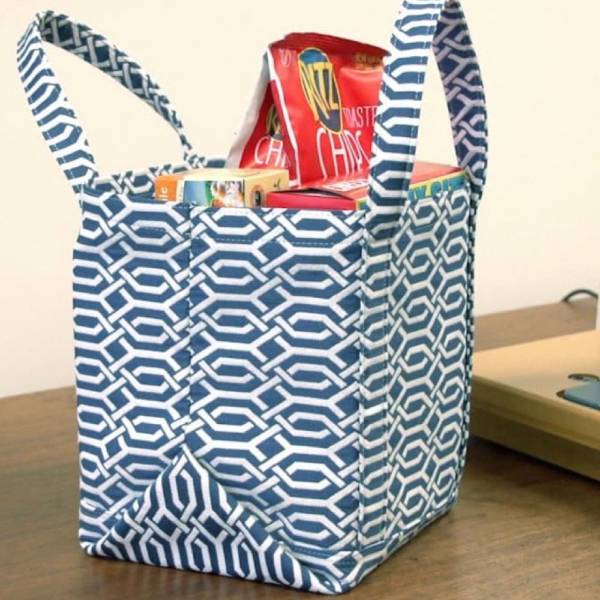
Now, turn your bag right side out. The lining should sit inside the exterior fabric neatly. Tuck the corners out to shape the gussets. Your shopping bag now has its shape. It’s almost ready for your trips to the market or store.
With the steps of how to make a shopping bag, progress is evident. The bag stands upright and showcases its design. Both the exterior and lining fabrics contribute to a strong and unique look. The next phase involves adding final touches to enhance durability and function.
Finishing Touches
Now that your bag is assembled, it’s time to strengthen and polish its design with some finishing touches. These steps are key to ensuring your bag not only looks great but will also stand up to the test of time.
Top-Stitching for Durability
Top-stitch around the top edge of your bag. Do this close to the edge, working through all layers. Keep the stitching neat as it will show on the outside. This keeps the lining in place and adds strength to your bag. Top-stitching also gives it a professional look, similar to store-bought bags.
For the handles, you will first need to ensure they are secure. Sew across the handle tops, right sides together. Be sure to stitch firmly, but don’t sew the handles shut. You’re making the handles strong enough to carry your items safely.
Sewing and Finishing the Handles
With the top-stitching complete, focus on the handles. Fold the handles in half lengthwise and pin them. This hides raw edges and makes the handles easier to grip. Sew from pin to pin across the handles. Align your stitching with the top-stitching for consistency. This also secures the raw edges inside, preventing fraying. Now, your handles are not just functional but also neatly finished.
These final sewing details transform your bag from homemade to handcrafted with care. By focusing on strength and aesthetics, you’re creating a shopping bag that’s as durable as it is stylish. By incorporating thoughtful details like top-stitching and finished handles, your custom creation can rival the elegance of a Marc Jacobs tote bag, merging durability with style for a truly unique shopping experience.
Final Steps
You’re almost at the finish line of creating your own shopping bag. Here are the last few steps to ensure your bag looks as good as it functions.
Pressing for a Professional Finish
A sharp-looking bag needs careful pressing. Turn your bag right-side out. Smooth out any wrinkles with your iron. Press the edges and seams well. This gives your bag a neat, finished appearance. Remember, good pressing can make the difference between homemade and handcrafted. When learning how to make a drawstring bag, remember that careful pressing is essential for achieving a polished look, as it can elevate your project from homemade to beautifully handcrafted.
The Last Stitches
Check the entire bag for any missed spots or loose threads. Sew any final areas that need more reinforcement. Pay extra attention to the handles and the opening of the bag. These areas endure the most stress when the bag is in use. Add extra stitches for added durability.
Once your bag is fully sewn and pressed, step back and admire your craftsmanship. You’ve learned how to make a shopping bag that’s not only practical but also reflects your style. It’s a product of your patience and skills, ready for its debut at the grocery store or market. Congratulations on completing your DIY project! Now that you’ve mastered your first shopping bag, consider exploring a new project with a drawstring bag pattern to expand your sewing skills and creativity even further.
Unveiling Your DIY Shopping Bag
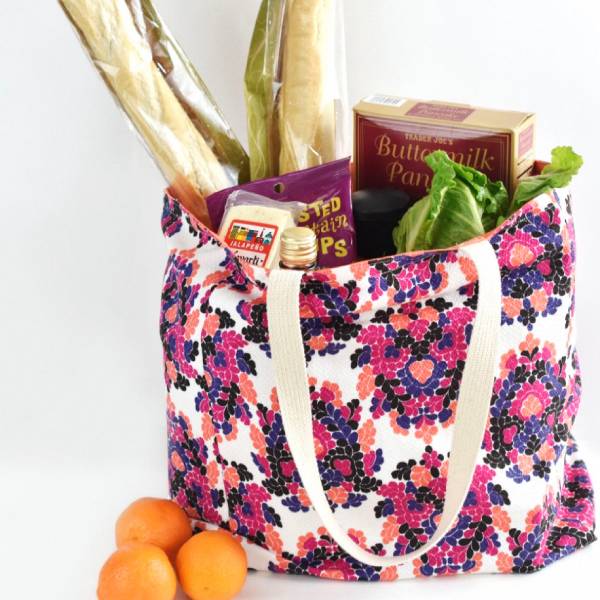
After meticulously following each step – from selecting materials to the final stitches – it’s a proud moment to unveil your DIY shopping bag. It stands as a testament to your creativity and dedication to crafting. Imagine the sense of accomplishment you feel as you hold up your completed shopping bag, knowing that each stitch and fold was your handiwork.
As you lay your bag flat, the sturdy fabric, the vibrant patterns you carefully chose, and the strong, secured handles all come together to form a shopping bag that is both functional and stylish. The top-stitching gleams subtly along the edges, adding to the bag’s polished look. The gussets at the bottom give it a shape that maximizes space while maintaining a sleek design.
The final pressing has paid off, and every corner is crisp, every line smooth. Your DIY shopping bag doesn’t just carry groceries; it carries a piece of your artistic spirit. Equipped to handle the hustle of shopping trips, this bag not only serves a practical purpose but also signifies a step towards a more sustainable lifestyle.
Reflect on the process, the patience, and the techniques you mastered on this creative journey. You’ve learned not just how to make a shopping bag, but also the art of transforming simple fabric into a staple of daily life. Your DIY shopping bag is ready to accompany you everywhere, from the supermarket aisles to the farmers’ market. So, sling it over your shoulder with pride; it’s a unique creation that perfectly captures your sense of style and commitment to DIY craftsmanship.